Evolution of a Mask
Though it’s not my primary focus, I like making masks. I am one of those people that has a near-impossible time of masking their emotions. My face is an animated, ongoing explanation of what’s going on inside my head at any given time. (though there is some confusion around my ‘thinking’ face, which apparently looks like I’m incredibly irritated) Sadly this means I will never be a great poker player. But hey, I can barely manage a game of chess without giving away my motives, let alone something with actual stakes!
So when I want to create a certain persona or image that is not my standard ‘cheerful geek’ personality, I pretty much have to resort to wearing a mask. Ideally one that covers my eyes, the most non-verbally vocal part of my anatomy. While this does not please my mom, who has on more than one occasion referred to my masks as ‘something a serial killer would wear’, I’m usually pretty pleased with the results!
While I don’t know the ‘real’ way to make a mask, but here’s a little insight into my typical process for the plaster-based masks:
Supplies:
- Wire mesh (in this case both aluminum & a finer brass variety)
- Plaster gauze / fabric (ex. http://www.amazon.com/Bulk-Plaster-Gauze-Inches-Feet/)
- Tape. Lots and lots of tape
- Aluminum foil
- A glass head, approximately my head size
Step One:
Rough out the mask shape with the aluminum based wire mesh. This is one of the few instances in which I actually made a paper test pattern for the beak portion prior to just cutting and sculpting it out. I am not so great with the planning sometimes, so I count this as a victory! I’ll post the beak template later if anyone is interested!
The wire mesh doesn’t all have to be connected as one giant piece (though it’s nice if you can manage it), as you can just tape it together to rough out the initial form. This is just the base layer for the plaster gauze, so it will be hidden in the end product. Having it pretty is a bonus, but not 100% necessary.
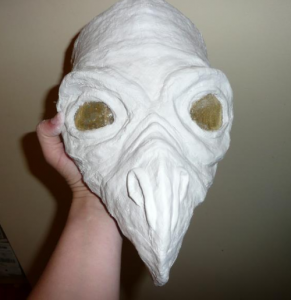
This was modified a bit after the photo was taken. The sockets around the eyes are roughed out in aluminum foil and taped into place. These don’t need to be super secure, just held in place enough that when the plaster gauze goes on, they form the underlying shape. Once the plaster hardens, they’re not going anywhere.
Step Two:
Onto the first pass of plaster gauze! This stuff is pretty easy, if a bit messy, to work with. I like to cut out a bunch of strips of varying sizes and dimensions before I even think about wetting them. Just look at the shapes your mask it formed of, then try and cut a bunch of pieces of gauze out that will fit well into those areas. Cutting the gauze while it’s wet isn’t fun and can do a number on your scissors, so just try and get a best guess on what you need and then adjust as you go along. The core need here is to completely cover the top surface of the metal mesh so that once it dries, you’ll have a firmer, more stable working surface to build from.
In this shot, I have the feathers and porcupine quills in the top inner section, but that’s just for spot-checking the overall look of the mask. They are not secured in any real way, and I waited until the first layer of plaster was completely set before slotting them in there. In general, you want to save any potentially fragile materials for the very last step.
As you can tell, the surface is still really rough, as are the edges. This is totally okay! You don’t need to have the full shape or surface finalized at this point. You just want to make sure you get that first layer down and that the general look is what you’re going for.
Step Three:
From here it’s onto the detail work! Once your base layer is set, you have a firmer working surface and can really start to build up the plaster gauze. If you really want to add depth, you can always add more aluminum foil at this point to create additional bumps, ridges, etc. I tend to just work from the plaster, but whatever floats your boat! It’s all about creating what you want to make after all!
In this instance I build in the brass mesh eyes. I wanted to build these up after the initial socket design, so that it would appear more natural, rather than as protruding out from the face. By building out the sockets first, I gave myself a guideline for where the eyes should be, and could build up to a reasonable depth before adding in the ‘eyes’. This helped prevent the mask from looking bug-eyed. (I think it did, anyway)
Step Four:
This particular piece was taking longer than usual to dry, so I stuck it in the oven at 200 F for around half an hour to fully dry it out.
That said, once you’re set with the overall look of the mask and have smoothed down any areas you feel are too high / too low / not quite what you wanted, etc, you can move onto painting! I tend to keep the paint work on my masks fairly minimal, but the sky is really the limit for how you want to paint your own.
If you don’t intend to paint your mask, I would highly suggest at least coating it with a polyurethane top coat. While the finished form of the plaster isn’t nearly as crumbly and messy as it is when it’s still in strip form, it’s still prone to flaking when bumped or scratched. Coating it with some poly helps prevent that and seals it a bit better from potential staining.
Rustic ‘outdoor nature shot’ optional. Our house has terrible lighting, even in the best of situations.
I wasn’t quite done with painting at this point, but it’s the only photo I took around this time, so it’ll have to do! I did some additional work outlining the inner portion of the eyes, then sealed the whole thing in a top coat of clear, glossy polyurethane.
Step Five:
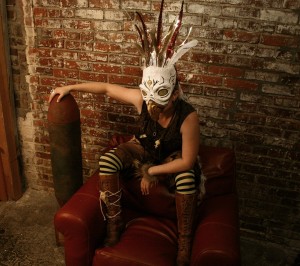
Decorate and be fabulous! In this instance I installed a bunch of pheasant feathers, African porcupine quills, turkey feathers, yarn, and a LED ‘twig’ decoration that I found in the floral arrangement section of Michael’s Craft Store. It’s a bit hard to see in this pic, but there are little lights back there in all that craziness!
This was specifically made for my slightly-too-early post-apocalyptic themed birthday party. I didn’t get to spend as much time as I’d like on it, but I’m pretty happy with it overall. And really, that’s pretty much why I make these!
Photo courtesy of Tony Cuozzo!
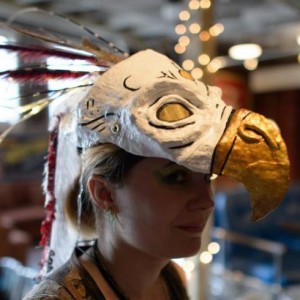
The mask in the ‘down’ position. Photo courtesy of the fabulous Christy Wiseman!


